Dec 22, 2018
THE "L" - Elevated railway kit - Straight plate girder section 372 mm #160-0101

The system is based on Kato Unitrack/Unitram standards. The standard track centre distance is 25 mm, and the length of the sections is a multiple of 31 mm. The structures are made basically of two components, the spans and the cross bents. They are designed to be erected over standard Unitram sections. Elevated sections can be connected directly with Unitrack/Unitram sections.
Double track and single track use the same spans, only the bents are different. Bents and spans are fixed with screws, the assembly is modular and can be constructed / deconstructed. Parts & Tools The construction requires some additional parts: Kato Flex track 21-000 and Kato UniJoiners 24-815.
You need the following tools: Allen key, AC glue, tools for cutting the flex rail, sandpaper, file The cross bents A standard cross bent is made of 5 parts: the top of the bent, two halves of the column gantry, and two column bases. There are two types of bent tops: Type A for middle bents, Type B for end or connecting bents. You can use end bents "B" in place of middle bents "A", but not inverse.

Assembling the cross bents
Start with glueing the halves back to back. Sand the top of the column assembly and glue it under the top. Then plug the column footers onto the bottom of the columns. You can glue them, or keep them removable. The bents are now ready
The spans
The standard span is single track 186 mm long, made of two twinned 93mm sections, with plate girder. Each span has two channels for the flex rails. Optional, you can add dummy 3rd rail, otherwise you can plug overhead poles into the 1.6 mm holes on top of the bent.
Assembling the spans
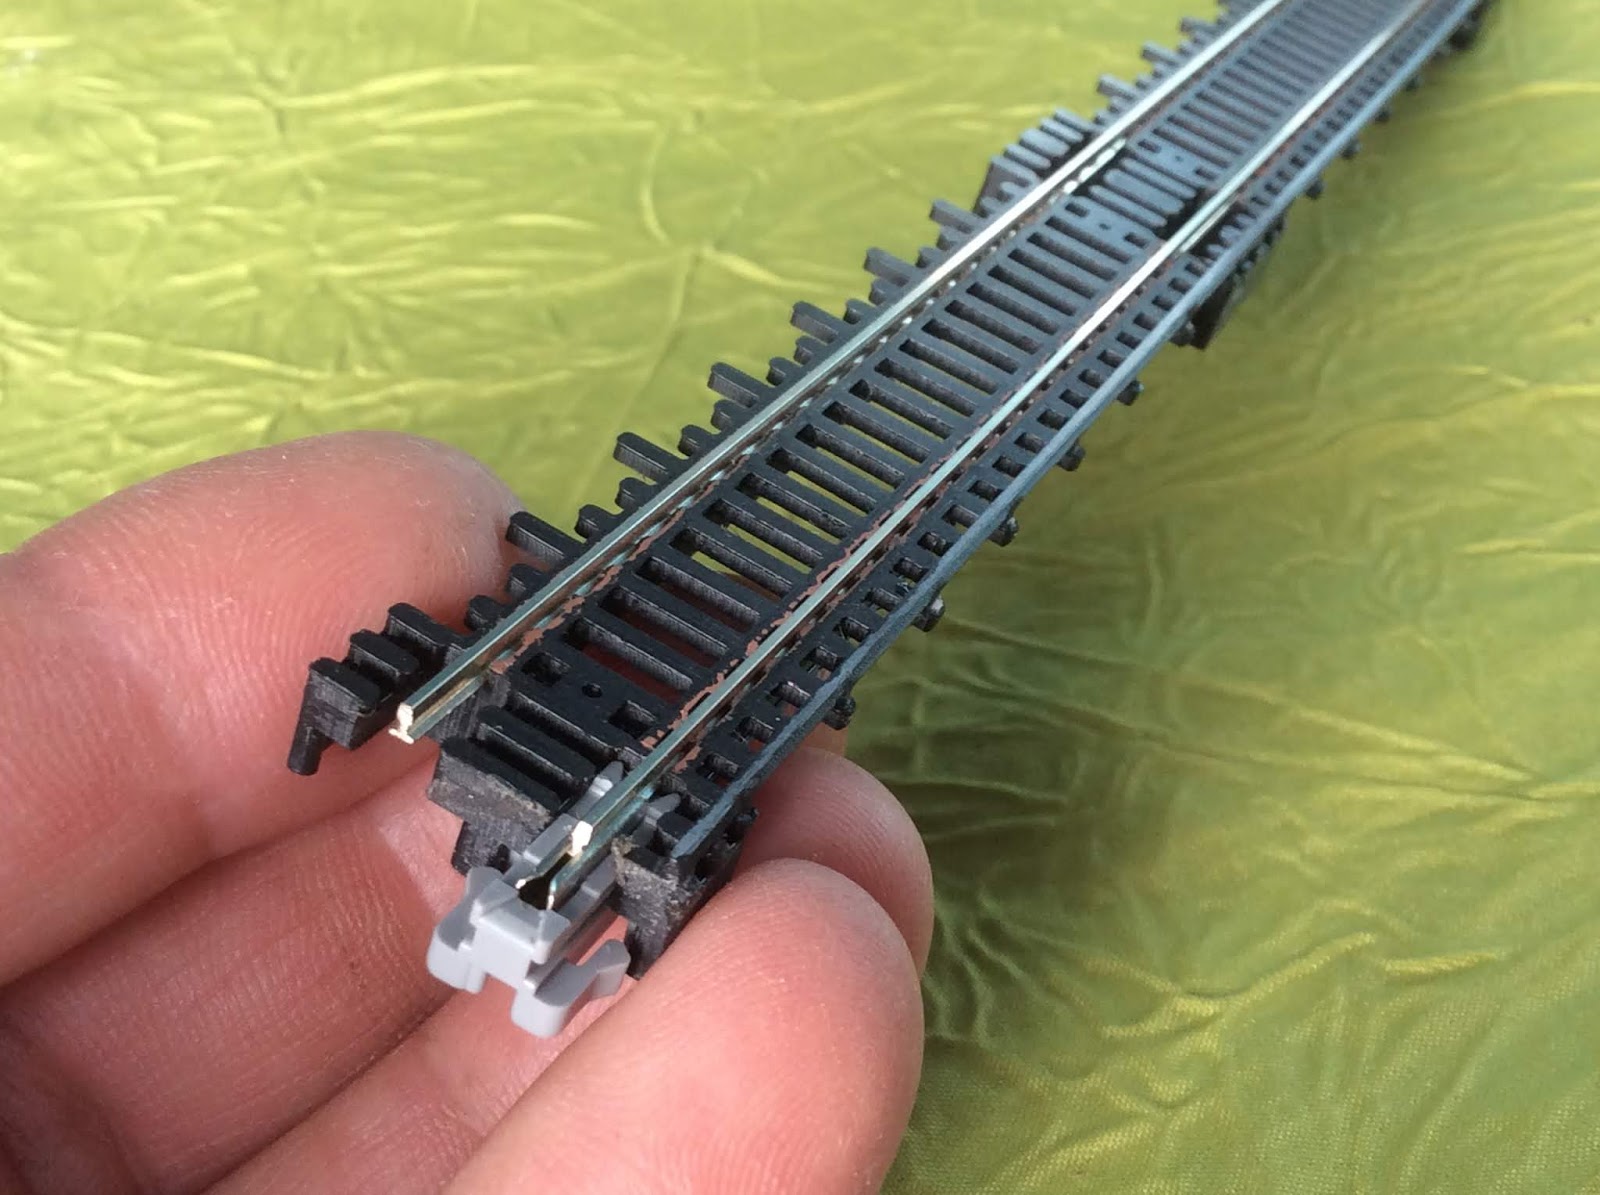
The plastic part present small edges on top, this is inherent to the production process. We recommend to sand the top end of the spans a little. Then cut the rails to 372 mm length, or 186 mm if you want to split the kit in two sections. File slightly the bottom ends of the rail profile, to avoid sharp edges. Push the tracks carefully into the channel of the spans, and plug one Kato UniJoiner on each track end, left side.

Assembling the Elevated sections
Plug the spans into cross bents. When building to 372 mm length, put an "A" middle bent in the center where two spans are connecting. If you build to 186 mm length, you place a "B" bent on the end. Return the assembly and fix the bent to the spans with M1.6 screws. 2 screws for one bent are more than adequate. Tighten the screws with care, otherwise you destroy the thread in the plastic bloc.
Adding 3rd Rail
Test the position of the 3rd rail before gluing, the small squares plug into the space between the sleepers on the the ends of a 93 mm sections. Chose the good distance to the track, my preferred value is 4 mm, inside rail to inside 3rd rail
 Fixing to pavement or Unitram sections
You can fix the Elevated sections to your pavement or to Unitram sections with 1.6mm screws. The holes on the cross bents are 54 mm apart in width, the columns are spaced 93 mm in length.
Connecting the Elevated sections with Unitrack
 Spans without a crossbend can be connected directly to standard Unitrack sections. When using crossbends on the end, you have to make a small cutout on the connecting Unitrack end Power supply We recommend use of UniJoiners with cables, but you can also solder directly cables to the tracks. Be careful when soldering, the heat can warp or melt the plastic.
May 16, 2018
#160-4130 Septa N5 ABB car
Modern stainless steel cars built 1991-93 by ABB Traction for the SEPTA Norristown High Speed line. The model snaps over a Tomytec TM12R drive. Please order also truck sideframes #160-8130 . The window glasses are actually not part of this kit, they will be produced separately and may be available soon, please look for announcements here on https://interurbanmodels.blogspot.com
Feb 26, 2018
«MAIN STREET» - modular storehouse fronts in N scale
Labels:
Laser Cut MDF,
Main Street,
N scale,
Structures
 Four modular fronts: http://r.ebay.com/4G3szZ
2 x Four modular fronts: http://r.ebay.com/EssIKe
A modular "architect game" in N scale with storefronts, upper floors and cornices. Each building is 46.5 mm wide, a four house row is fitting exactly into a 186 mm Kato Street track length.
Each building front is different, but all storefronts, upper floors and cornices can be mixed.
The kit is easy to build - assembly requires a steady hand and some patience. You will need to provide: white glue, some sandpaper, a pin or a toothpick, a good fine cutting knife and tweezers.
The parts are cut from 1mm MDF. If any part is missing or broken when opening, please send me an e-mail with a photo or sketch of the part.
All parts are on a fret-plate and have to be cut out of it very carefully, along the short connecting links. Use a very sharp cutting knife.
Start with the storefront A, then mount the floor B, and finish with the cornice C.
There are several hood designs available for each house. Main Street 2 and 4 can be mounted without hoods.
Painting:
The upper floor brick facade don’t need to be painted, if you want to represent yellow brick. Otherwise you may choose a red terracotta shade.
Even the storefront, the windows, the cornice and the hoods can stay without paint. But you can apply also bright colors, there is a prototype for everything!
We recommend «thick» paints, the MDF soaks up a lot of paint, make some trials on surplus MDF before. Personnaly, I use acrylic paint pens with fine points (brands like Posca or Molotow)
I would appreciate any suggestions or feedback. Have fun with the assembly.
Subscribe to:
Posts (Atom)